now the first thing you need is to get a good source image , i used this house which is shown at a kool angle and a dog lookin out of the window supposedly because it is raining....
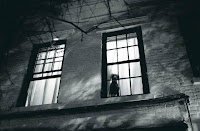
Duplicate the layer ( press Ctrl+J ) or just drag the layer to the create new layer button at the bottom of layers tool box ,
Now go to Image > Image Adjustments > Levels and make your settings as shown in the image below ...
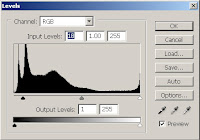
Even tough the image we have is already dark ,that would have given the image the necessary dark appearance as you would have on a rainy day ..
The next step is to create rain
Create a new layer (Shift+CTRL+N) with a white background and name it rain for easy reference later
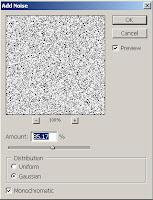
Now go to Filter > Noise > Add Noise and make your settings as shown in the image below ....
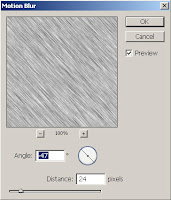
Now go to Filter > Blur > Motion Blur and make your settings as shown in the image below ..
Now go to Image > Image Adjustments > Levels and make your settings as shown ....
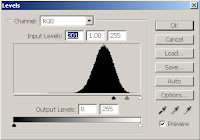
Go to layers pallet and change your blending mode to screen
well we got it raining already but i just want it to rain more heavily so make another copy of the rain layer, set the blending mode to screen on this layer too
and go to Edit > Transform > Rotate 180 degrees clockwise and reduce the opacity of the layer to around 82,
now with the topmost layer selected press Crl+E to merge the two top layers
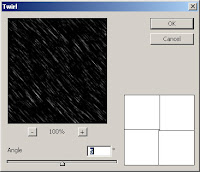
Now it rains but we dont have any wind , so our rain is not realistic yet , now go to Filter > Distort > Twirl and make the settings as shown below ....
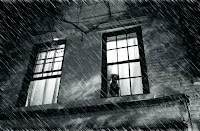
Final Product
No comments:
Post a Comment