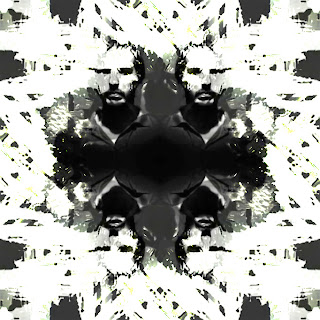
This tutorial consists of flipping, mirroring and rotating the same image over and over again to create a cool pattern! We'll also explore photoshop's layer blend modes.
Step 5: Flip the image on the right horizontally. Edit > Transform > Flip Horizontal
Step 6: Merge the two layers together. Layer > Merge Down - You'll notice in your Layers palette the two layers merged into a single layer.
Step 7: Duplicate the layer. Command+J
Step 8: Double the height of the canvas. To force extra space to appear below the image, click on the top middle square of the Anchor grid:
Step 9: Drag the imagine on Layer 1 below the original while holding down the shift key.
Step 11: Merge both layers onto a new later. Hold down the Option key and go to Layer > Merge Visible.
Holding down the option key tells Photoshop to merge our existing layers on to the new layer.
Step 13: Crop the document around the rotated image. Hold down the Command key and click directly on the preview thumbnail for your rotated layer in the Layers palette:
This will place a selected outline around the rotated image in the document. With the selection outline in place, do Image > Crop.
After cropping, use Command+D to remove the selection outline.
Step 14: Change the layer blend mode. This is example of using the Darken blend mode:
Step 15: Merge both layers onto a new layer. Once again, hold Option and Layer > Merge Visible.
A new merged layer appears.
Step 16: Rotate the new layer 45 degrees. Edit > Transform > Rotate. The Options Bar (below) along the top of the screen will change to display options. Enter 45.0 in the Angle box.
Press enter and press enter again to exit out the rotate command.
Step 17: Change the blend mode. This is an example for lighten:
The result is at the top of this post.
No comments:
Post a Comment